User Guide – Teamoty Scheduling
7. MOBILE VERSION
7.1. Access
To access the mobile version, you can find a shortcut via the web version. To do this, when you log in, you have a MOBILE APP tab: 
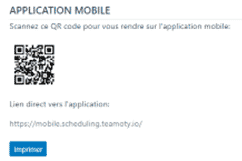
![]() You can print the QR code by clicking on the button
You can print the QR code by clicking on the button 
7.2. Login
- Make sure you’re on the link: https://mobile.scheduling.teamoty.io/ on your tablet or smartphone.
- Log in with the same credentials as the web version.
- There are no apps to download from the Apple Store, Google Store or Android Store to connect to Teamoty.
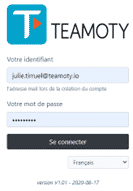
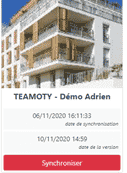
- When you log in, all the projects you have access to are displayed as follows:
7.3. Before pointing
- Before leaving on the site to point the progress, you must synchronize the project, by clicking on the


- This allows the retrieval of information about Teamoty online, with all modifications of the project
- Once the synchronize button is green, you can go to the construction site and use the mobile app offline, so it is no longer necessary to have internet on the construction site.
7.4. Choice of areas
- Once the project is synchronized, you can open the project by simply clicking on it.
- You arrive on the list of project areas, as below:
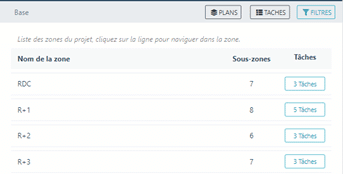
- You can sort by names or area by clicking:

- At this point, you can either point tasks by clicking on a specific area, for example by clicking on RDC, you will fall on the lower zoning level, or apartments:
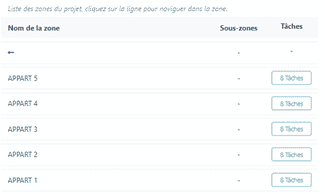
- In front of each area, you can click on the tasks to access all the tasks in the selected area and see the number of completed tasks on the total number of tasks in the area and the percentage of progress, for example:

- You can also choose which areas to point to by clicking on

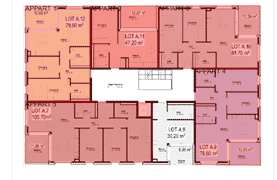
- You can also display the list of all tasks by clicking on


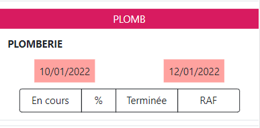
- You will find the start and end dates of each task in the color of the workflow, for reminder:
For example for a late plumbing task, on the mobile version you will find it like this:
7.5. Pointing
- To point a task, simply click on one of the possible scoring possibilities:

- At that time, as on the schedule, you can either:
- Partially point by selecting the percentage of progress then this screen will appear:

Either click on one of the proposed percentages or by entering the desired percentage and then click OK.
-
- Point the task as started by clicking on

- Point the task to 100% by clicking on

- Partially point the task one with RTBD (Rest to be done), completing the information of what remains to be done, then adding a comment and/or photo:
- Point the task as started by clicking on
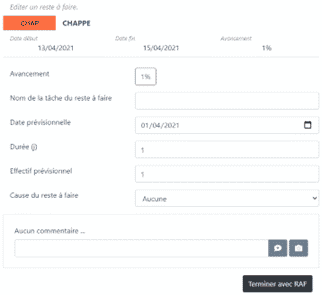
All RTBD information will be found in the web version of Teamoty (in the tab Rest to be done (RTBD))
- Once pointed, you can see the point made on the task:


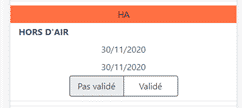
- Milestones defined as “make pointable” can be directly validated on the mobile version:
Either in Not validated or Validated status
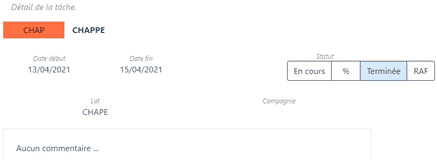
- By clicking on the pointed tasks, you will see the score detail, with the start/end date, progress and status as below:
- Here you can add blockings points on each task by clicking on:

- Areas where scoring has been done will be marked in yellow:

![]() You can select multiple tasks at once to point them at once. Simply click on the color thumbnail of each task and then click on the desired
You can select multiple tasks at once to point them at once. Simply click on the color thumbnail of each task and then click on the desired 
- Once the score is complete, you can close the project:

- It is necessary to synchronize the project again: the


- This last step must be done with an internet connection.
7.6. Pre-pointing
It is possible on Teamoty to do pre-pointing and pointing . Pre-pointing is done by the profiles: subcontractor as well as read-only + pre-pointing. The pre-pointing must be validated or not by the other users. The subcontractor profile can only point to the tasks assigned to him.
- Pre-pointing profiles will be able to:
- Or “%” to set partial point with associated percentage
- Either “in progress” to define that the task has started
- Be “completed” to define the task as completed
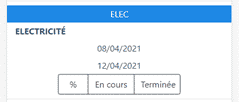
- Once the pre-pointing has been completed, the other users can validate or not:
Areas where pre-pointing has been done will be marked in yellow:

- This pre-pointing will be either validated or rejected, and a new score will have to be made:

- Once the point is validated, it will automatically update on the schedule.
7.7. Worforce follow-up
Workforce monitoring can also be done from the mobile version. To do this, once connected to the project, at the top right you will find the button: 
Then you will come across the list of batches (or companies) by default on the current date.
You can change the current date and click on 
For this module to work, it requires an internet connection. You must be connected to the Internet, otherwise an alert message will appear.
